Here in How to"how-to" we collect the best and the most honest article over the Web to reduce the searching time for you,you can even send us you're own article or videos to publish it, or if you need anything our email is how-to@mail.com

Showing posts with label Style. Show all posts

3 Gorgeous Wedding Hairstyles You Can Create Yourself

Roll up twist
Doing your own hair to attend a special event or wedding can be completely intimidating, so I thought I would share some hairstyles I have tried on my own hair recently that worked for a quick and easy solution.
With each of these hairstyles, prep your hair by creating ready-to-go waves. Using a medium barrel curling iron, wrap section by section around the wand starting at the top and hold. Do not clip. Finish with hairspray or texturizer for hold.
Wrap twist pony tutorial steps
Twist and Wrap Pony
1. Add waves and texturizer or hairspray (see above).
2. Gather into a side ponytail and secure with a hairband.
3. Separate the hair in two above the hairband.
4. Flip ponytail under and through the hole.
5. Pull the ponytail up to tighten.
6. Pull out sections of the twisted sections for full, looser look.
7. Take a section of hair behind the ponytail and wrap around the hairband. Secure with a bobby pin. Now you’re ready to go!
This is a simple spin on the good old Topsy tail. I wore this style to a wedding last weekend and it lasted all night. Hairspray doesn't hurt either.
Double braided crown tutorialDouble crown braid tutorial Double crown braid ponytail version
Double Crown Braid
1. Add waves and texturizer or hairspray (see above).
2. Take a 1 inch section from behind each ear and braid all the way down.
3. Pull the first side over around your ear and to the other side of your head and secure with bobby pins. Place those pins through the braid so they don’t show.
4. Do the same with the second side, securing the braids to each other with more bobby pins.
5. Bring the hair over the sides so ends don’t show. Hairspray to secure.
6. For an alternate version, swoop hair to the side for a side pony look.
So easy, but really elegant, fun, and will last all night! However, if your hair is silky straight make sure to use lots of hairspray.
Floral twist steps
Floral twist finished look
Floral Twist Up
1. Add waves and texturizer or hairspray (see above).
2. Gather your hair back and start to roll the ends up (facing ceiling).
3. Continue to roll until you reach the base of your neck.
4. Use multiple bobby pins to secure the twisted sections to the back of your head. I place them behind the front of the roll so they can’t be seen.
5. Hairspray to hold.
6. Using a floral strand or floral crown (I folded my wire crown in half), place inside the twist up and secure with more bobby pins.
This can be bridal, for a bridesmaid, or even if you are attending a nice event. Works for day or night!
Which look do you like best? Be sure to let us know if you give it a try! Would love to see the results!


Read more : ehow

Mad For Plaid: How to Work Tartans Into Your Wardrobe

tartam swatches
With the holiday season upon us, it’s time to consider adding a festive note to your wardrobe. We’re not suggesting you stock up on ugly sweaters, but there’s no need to be totally somber either. Classic tartans offer a variety of ways to lend a dose of cheer. At once both bold and traditional, these time-tested patterns work in a variety of situations, from a simple hint of holiday spirit to black-tie formal.
IMG_1813
The Tartan Tie
No doubt the easiest and least over-the-top way to wear a tartan is as a seasonal tie. Best rendered in soft wool or wool blends, a tartan tie adds modest cheer to the standard business uniform of navy and gray. Worn with jeans and a sweater, it’s perfect for a night out with friends.
IMG_1827
The Tartan Shirt
For casual, laid-back situations, try a tartan shirt. A perfect stand-alone item with jeans or khakis, you can dress it up with a tweed jacket, corduroy slacks, hefty shoes and a knit tie for a look that is sharp but cozy. Opt for darker tartans in a smaller scale to prevent an overly busy look.
IMG_1834
Tartan Trousers
While certainly not for the faint of heart, a pair of heavy wool tartan trousers can be a fun choice for holiday parties. The trick is to keep the rest of the outfit subdued. Simple items like white shirts, solid Shetland sweaters or dark blazers work best with this bold fashion statement. Also great with crackling fires, spiked eggnog and good company.
IMG_1831
The Tartan Blazer
A tartan blazer may seem like a tough look to pull off, but in a relatively dark scheme like classic Black Watch, it can be easier than you think. As with the trousers, opt for simplicity in the rest of the outfit. A white shirt, gray flannels and black knit tie with a tartan jacket can be quite dashing. With jeans and a black turtleneck, you might even say it’s cool.
IMG_1832Tartan Formal Wear
If you’re headed to a party that’s both formal and fun, consider adding tartan to your formal-wear options. While a tartan bow tie with a tuxedo can have a bit of a high school prom vibe, replacing the tux jacket with a tartan blazer makes a real statement. Choose tartan with a good deal of black or navy in the background to help it marry well with the black and white of the rest of the outfit.
Another option might be to swap in a tartan shirt with a tux, if you can find one with French (double) cuffs. Tread lightly here, and be sure that the event you’re attending is more about fun than formality. If that’s the case, get ready for good cheer and plenty of sparkling conversation.
Additional Notes:
Kilts: The oldest and most traditional use of tartan is a true Scottish clan kilt. If you or your family has claim to such a thing, wear your kilt in the best of spirits. If not, leave it be. Wearing a kilt you have no claim to can actually be insulting.
Tartan Outerwear: A parka or quilted vest in a tartan pattern can be great way to work tartan into everyday winter casual looks. Just be sure it’s not your only option.


From : ehow

Instagram fashion tips of the week

image

The logo tee is still going strong, and Carine Roitfeld knows it. Pair yours with a peppy coat to mkae a real statement
image

The dress-over-trousers look has been waging a comeback for quite some time. We weren't convinced until Danielle Bernstein tried it this week; a midi cami dress gives the idea a whole new spin, and we like it.

image

We're drawn to dark colours in the winter, but Tamu McPheron is convincing us to lightn up with this colourful cosy combo

image

We haven't worn the humble hair clip since we were about 10, but Alena Chendler's jumbo one has got us seriously reconsidering

image

Knitted two-pieces are everywhere thanks to Celine, and Zina Charkoplia's grey combo from Zara is just the ticket - and looks super comfy to boot

image

Remeber the Manolos Big used to propse to Carrie? Well now they're even more covetable in flat form. Thanks Dalia Nsouli, our wishlist just got a whole lot more expensive

image


We were always told that black and navy were a no-no, but how wrong we were. See Ann Kim for proof

image

We've been obsessed with Louis Vuitton's Petite-Malle bag ever since it hit the catwalk back in 2013 - and now it comes in a soft version too. Be still outbeating hearts. Thanks for the heads up, Maria Dueñas Jacobs

image


An oversized trench is now our outerwear of choice, thanks to Patricia Manfield

image

We're always looking for new ways to revitalise our wardrobe essentials. This week, Natasha Goldenberg's nifty shoe lacing is our hero tip


Fashion Tips for a Little Holiday Party Magic

The coolest girl at the party knows the secret: perfectly done is overdone.
You see this girl at every gathering, the one whose hair is a little tousled, whose shoes don’t seem to hurt. She’s not tugging at her skirt or sneaking peeks in shiny surfaces to see if her Spanx are showing.
The secret ingredient is ease, in the way she moves and in the way she wears her clothes. And even if she’s going out on a limb, taking a stylish risk — it’s a little one.
“Going to a party, you want to feel special, a departure from every day, and a little outside of your comfort zone,” the designer Rosie Assoulin said. But when you break it down, she said, you have to be more you than new — “perhaps 80 percent yourself and 20 percent something new.”
Laura Brown, the executive editor of Harper’s Bazaar, likes to start with one element she loves. For her, it’s a black Stella McCartney jumpsuit that “feels ’70s and saucy and pulled together at the same time,” she said. “You give yourself the luxury of being able to subvert it, add to it or take away from it.”
Cool girls often play up contrasting elements. If they’re wearing a feminine dress, they add a tailored jacket or mannish shoes. They may wear a bohemian blouse with something structured like a pencil skirt, a minidress with a maxi-coat, an austere style with whimsical heels. If their look is polished, they shake out their hair.
How can the perennially pressed magically develop this sense of ease? Pockets are good — in pants, a full skirt or a relaxed dress. You look more comfortable when your hands have a home. Avoid anything skin tight. It’s impossible to project confidence when you can’t sit down.
“Be able to breathe,” Ms. Brown insists. “Physically and metaphorically!”
The best advice of all: don’t try to be perfect. Confidence may just come from embracing our imperfections. “When you look too perfect, it’s kind of scary because it means you spent too much time,” said the stylist and fashion consultant Ada Kokosar. “Imperfection makes you more human and also more intriguing. You open a door for a story to tell.”

From :NYTimes

How to Curl Hair With a Flat Iron

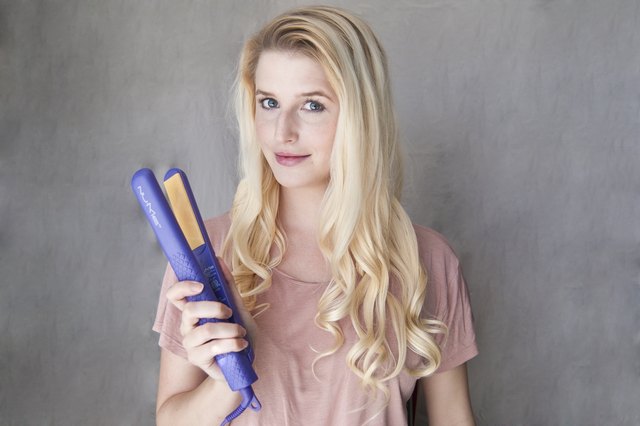
How to Curl Hair With a Flat Iron. Bless the person who invented the flat iron. Previously, those of us with curly hair had to suffer through straight hair trends, laboring hours to straighten out unruly tresses only to achieve a fluffy mess. Now the formerly frizzy can easily reach super-smooth status. But a flat iron can also curl your hair. Yes, the exact same tool you've been using as a straightener does double duty to create gorgeous, bouncy curls.
How to Curl Hair With a Flat Iron
How to Curl Hair With a Flat Iron (Sadie Porter/Demand Media)

Things You'll Need

  • Flat iron
  • Heat damage protection gel

Step 1:
Choose the right flat iron. You need a skinny one; an inch-and-a half or less is best. If your hair is very coarse or curly, the flat iron needs to get very hot, at least 400 degrees Fahrenheit. Look for a flat iron with rounded edges on the plates to prevent unnatural "dents" in your hair.
(Sadie Porter/Demand Media)
Step 2:
Apply a light gel that contains a heat protector to prevent hair damage.
(Sadie Porter/Demand Media)
Step 3:
Dry hair completely. Even slightly damp hair will not curl as well, and a good blowout gives you a smooth start for frizz-free curls.
(Sadie Porter/Demand Media)
Step 4:
Clamp a 1- to 2-inch section of hair about halfway through the strand and turn the flat iron one-and-a-half turns in the direction you want your curl.
(Sadie Porter/Demand Media)
Step 5:
Pull the flat iron through the strand while maintaining tension on the curl.
(Sadie Porter/Demand Media)
Step 6:
Repeat on small sections of hair until it's all curled. Don't worry-the more you do it, the faster you'll get.
(Sadie Porter/Demand Media)
Step 7:
Spray with hairspray to make your curls last longer. Use aerosol hairspray to avoid overwetting you curls. Spray underneath, too.


From : ehow

How to Get Long-Lasting Curls With a Lemon

How to Get Long-Lasting Curls with a Lemon
Do you spend a significant amount of time styling your hair into curls only to have it fall flat and straight hair in a couple of hours? My mother used this simple trick on my very long hair when I was a little girl, and I continue to use it today. My hair was so straight and long that its weight would not allow curls to last. Whenever I asked her to style it into curls, she would set it with a lemon instead of harsh products.
If you apply the lemon straight to your hair, you will get a stronger hold; however, if your hair is dry you may want to dilute one freshly squeezed lemon with 2 ounces of water in a spray bottle. Lemons can have a lightening effect on hair, but unless you spend significant time in the sun, lemon alone will not affect your color.
How to Get Long-Lasting Curls with a Lemon
Here is what you need:
  • One hair brush
  • Some clips to section your hair and keep it place while you are working on another hair section (I use these)
  • Old-school foam rollers (you can find them here)
  • One lemon, cut in half
  • One spray bottle to mix lemon and water if you decide to dilute the lemon juice
How to Get Long-Lasting Curls with a Lemon
Instructions:
At night, before going to bed, wash and dry your hair. Brush your hair thoroughly and begin sectioning your hair so you can apply the foam rollers. For small, tight curls, make the sections small. For big, loose curls, make the sections bigger.
How to Get Long-Lasting Curls with a Lemon
Grab a lemon half and rub the hair section you created. Make sure to rub enough so your hair looks wet. Brush the section to thoroughly distribute the lemon juice, and then roll the section into a foam roller.
Styling With Lemon 4
Repeat this process until you’ve rolled all of your hair. If you prefer to use diluted lemon juice, spray each section of hair instead of rubbing the lemon, but make sure the lemon juice is strained (with no pulp or seeds) so it won’t clog the bottle nozzle.
Styling WIth Lemon 5
Get a good night’s sleep, and in the morning loosen up your hair.
The curls may be quite crispy and defined at first, but as you go on with the day they will loosen up a bit. However, they will last much better and longer than without any styling product. Best of all, your hair will smell fresh without the strong synthetic scents contained in conventional styling products.
Styling With Lemon 6
You can also use the same method to achieve waves. Just rub the lemon/spray the mix onto your hair and then braid it.
I hope you give it a try!
Photo credits: Lilly Wallace


From : ehow

DIY Braided Leather & Chain Bracelet

Braided Leather and Chain Bracelet styled with additional bracelets
This braided leather and chain bracelet DIY showcases how combining different textures can add an element of the unexpected to your look. Scrap leather is wrapped around heavy duty chain, bit by bit. The end result? An interesting effect that looks just like a braid. Follow the step-by-step tutorial below.
Supplies for Braided Leather and Chain Bracelet
Supplies:
- Scissors
- 3-in-1 pliers
- Scrap leather or pleather
- Heavy-duty curb chain (wrist measurement)
- Large jewelry clasp
- 10mm jump rings (2)
Cutting leather for bracelet
1. Cut a strip of leather measuring just under 1/2 inch wide and at least 24 inches long.
Weaving leather through chain
2. Lay the curb chain flat on your work surface–this will make braiding the leather around each link easier. Insert the leather through the first link, adjusting it so you have an equal length of leather on each side.
Braiding leather around chain
3. Bring the upper strand over the lower strand.
Braiding leather around chain
4. Insert it through the second chain link and bring it to the left.
Braiding leather around chain
5. Bring this strand over to the right side, folding it over the chain link.
Braiding leather around chain
6. Take the upper strand and lay it over the lower one.
Braiding leather around chain
7. Insert it through the third chain link.
Braiding leather around chain
8. Bring it over to the right side, folding it over the chain link.
Tied leather at end of bracelet
9. Repeat this sequence (Steps 3-8) until you have reached the end. Tie a tight double knot.
Trimming excess leather from bracelet
10. Trim away the excess.
Finished Braided Leather and Chain Bracelet
11. Attach a jewelry clasp to one end using a jump ring. Attach a second jump ring to the opposite end. This completes your bracelet.
Braided Leather and Chain Bracelet styled with additional bracelets
Once you start wrapping the leather around the chain, the surprisingly easy nature of this technique will unfold. It’s much simpler than it looks! To style your new bracelet, pair it with thinner bracelets in coordinating colors and materials for an awesome set of arm candy.
Photo credits: Kirsten Nunez (Step-by-Step Tutorial) & Haruka Sakaguchi of The Denizen Co. (Street Style)


From : ehow

Copyright © The largest collection of How-to articles | Powered by Blogger

Contact Us - Privacy / Terms